Magic Sheet Object Library
Expand individual sections below to view more information, or use the Expand All button in the topic toolbar.
The object library is located on the right side of the Magic Sheet Editor, above the Magic Sheet Object Inspector , and contains the buttons, shapes, fixtures, images, and other objects that can be added to a magic sheet. It also provides access to the Magic Sheet Settings.
The library is organized into the following tabs:

| 1 | Objects | 2 | Fixtures | 3 | Images | 4 | Magic Sheet Settings |
Objects
The Objects tab contains the majority of the object types that can be added to magic sheets.
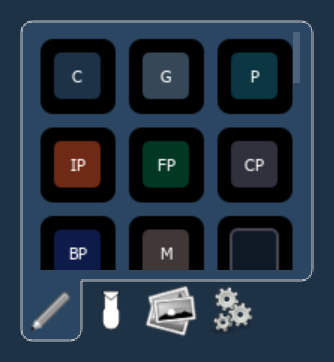
Many objects are buttons that behave like Direct Selects [Tab 4] for a default target type, which can usually be changed once the object is added to a magic sheet. Exceptions are noted below.
Object settings can be adjusted in the Magic Sheet Object Inspector area below the object library.
Channel
Channel objects by default act as direct select buttons for an assigned Channel.
This object type
Group
Group objects by default act as direct select buttons for assigned Groups.
This object type
Preset
Preset objects by default act as direct select buttons for assigned Presets.
This object type
Palettes
Palette objects by default act as direct select buttons for assigned Palettes. Objects are available for the following targets:
This object type
Macro
Macro objects by default act as direct select buttons for assigned Macros.
This object type
Button
Button objects by default have no associated target, and can be assigned to act as direct select buttons for any target type once added to a magic sheet.

Tombstone
Tombstone objects mirror the channel indicators from the Live and Blind [Tab 1] for an assigned channel.
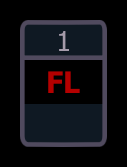
This object type
Fader
Fader objects act as virtual fader controls similar to those available via Fader List [Tab 35] ([Tab] [3][5]) and Fader Configuration [Tab 36] ([Tab] [3][6]). Fader objects assigned to existing faders will mirror their settings.

Virtual faders can also be controlled using a mouse scroll wheel with the pointer over the fader.
A number of unique Fader Properties affecting their appearance and behavior on magic sheets are available via Magic Sheet Object Inspector.
This object type
Command Line
Command line objects mirror The Command Line. They can be assigned to mirror the command line for any user number, and multiple command lines for different users can be used on the same magic sheet.
The command line is not mirrored when using the Magic Sheet Editor.

This object type
Label
Label objects add descriptive text to magic sheets.
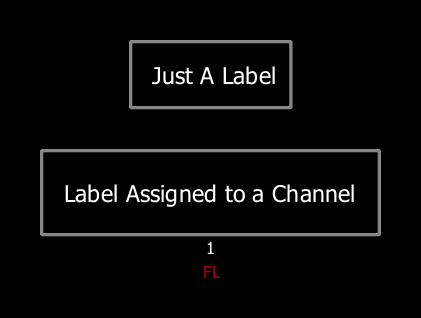
This object type
Clock
Clock objects add a digital clock to magic sheets, displaying hours, minutes, and seconds in 12-hour time, mirroring the device time. The clock format cannot be changed.
The clock does not display time when using the Magic Sheet Editor.

This object type
Timecode
Timecode objects display the Timecode status of specified show control Event Lists.
The following options are available:
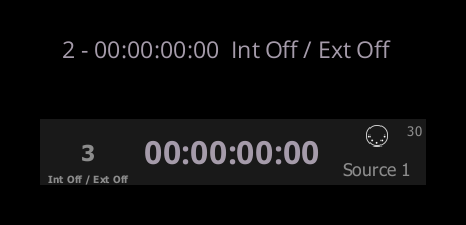
- Time Code Status - displays only the timecode status of the assigned event list.
- Time Code Widget - displays the timecode status of the assigned event list, along with additional information and control options for the timecode source.
This object type
sACN Input
sACN objects display the current sACN input values for a specified Address.
This object type
Foundation Motor
Foundation motor objects display the status of a networked ETC Foundation rigging system controller. For more information, see etcconnect.com/Foundation. This object type, other objects, and Eos in general cannot be used for rigging control.
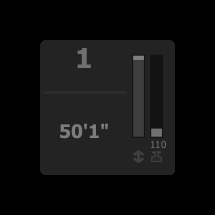
This object type
Response Analog IO
Response objects display the status of a networked ETC Response Analog IO gateway.
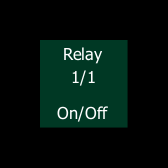
This object type
Pipe and Truss
Pipe and truss objects can be used to represent your system's physical lighting infrastructure, draw a line between objects, subdivide buttons, decorate your magic sheet, and so on.

This object type
Shape
Shape objects by default have no associated target, and can be assigned to act as displays or controls for any target type once added to a magic sheet.
Unlike button objects, shape objects assigned to controls do not show a visual indication when they are pressed or used.
Freeform
Freeform objects can be used to create custom shapes, lines, and arrows, which can then optionally be assigned to a target.
The following options are available:
- Freeform - create a custom polygon shape.
- Line - draw a line with multiple segments.
- Arrow Line - draw a multiple-segment line with an arrow at the end.
- Double Arrow Line - draw a multiple-segment line with an arrow at both ends.
Click to create a starting point and drag to draw a line. Continue clicking to create vertices (corners) until the shape or line is complete.
Double click to finalize the shape or line. If necessary, reshape it with the pink Object Handles.
Fixtures
Objects specifically designed to represent common lighting fixtures are available in the Fixtures tab.

The following fixture icons are available:
![]()
Other than their shapes, fixtures are no different from other magic sheet objects, and are configured via Magic Sheet Object Inspector.
For example, this fixture has been assigned a number of Fields to display useful information about its current intensity level, channel number, fixture type, and color.
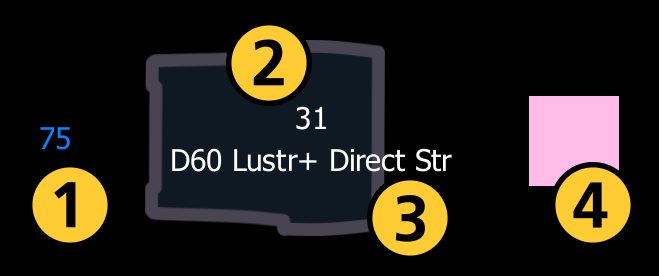
| 1 | Intensity | 2 | Target Id | 3 | Fixture Type | 4 | Color Swatch |
Fixture objects will automatically be assigned to a channel using the numbering defined in the Target Bar, but can also be reassigned to different target types.
Importing Fixtures
Additional fixture images in SVG format can be imported and linked to a target channel’s color, intensity, or both.
SVGs are vector-based images which can be scaled to any size without losing resolution. Each image layer can be given an internal ID tag, which can be viewed and edited in an SVG editor, such as Inkscape, or directly in the code by opening the SVG file in a text or code editor, such as Notepad++.

| 1 | Fill color (etc_symbol_base) |
| 2 | Outline (etc_symbol_outline) |
At least one element, typically the fixture fill color, must have one of the following IDs:
- etc_symbol_base0 - links the fixture fill opacity to the target channel's intensity level.
- etc_symbol_base - links the fixture fill color to the target channel's color and the fixture fill opacity to the target channel's intensity level.
- etc_symbol_base2 - links the fixture fill opacity to the target channel's intensity level.
At least one element, typically the fixture outline, must have one of the following IDs:
- etc_symbol_outline0 - links the fixture outline opacity to the target channel's intensity level.
- etc_symbol_outline - links the fixture outline color to the target channel's color and the fixture outline opacity to the target channel's intensity level.
- etc_symbol_outline2 - links the fixture outline opacity to the target channel's intensity level.
Any additional elements in the SVG that are given one of the ID tags above will also follow the target channel's color, intensity, or both.
Layers with tags not matching those above, or without tags, will be removed on import and not displayed.
Once properly tagged, the custom fixture image can be imported using the {Import} button in either the object library's Images tab or the library of Icons that opens in the Central Information Area (CIA).
Images
Images can be added from the library of Icons in the third tab and used as objects or backgrounds.
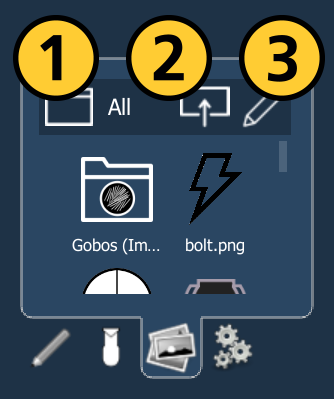
The following options are available:
| 1 | {Directory} | Identifies the folder of images currently being viewed. In subfolders, such as Gobos (Imported), the button can be used to go back up one level in the hierarchy. At the top level (All), the button does nothing. |
| 2 | {Import} | Adds new images to the library, using the pop-up to navigate to the file's location. Use {OK} to import the image or {Cancel} to close the pop-up. |
| 3 | {Edit} | Opens the Icons display in the CIA, which provides additional options for organizing images and folders in the library. |
Drag images from the library onto the magic sheet to use them as objects. Once placed, they can be configured and edited like any other object via the Magic Sheet Object Inspector.
Images can be assigned as backgrounds for an entire magic sheet in the Magic Sheet Settings tab under Live and Blind Backgrounds.