Magic Sheet Layout Toolbar
Expand individual sections below to view more information, or use the Expand All button in the topic toolbar.
The layout toolbar is always visible at the top of the editor, providing various options for adjusting and arranging magic sheet objects.

Undo and Redo
![]()
Use {Undo} and {Redo} to revert and restore changes made while in the Magic Sheet Editor. When hovered over, a tooltip will provide a description of the action to be undone or redone. When no available actions can be undone or redone, the respective button is disabled.
These tools can also be activated with the default Windows or macOS keyboard shortcuts for undo (CTRL+Z or CMD+Z) and redo (CTRL+Y or CMD+Y).
{Grid Toggle}
![]()
A grid is overlaid on the magic sheet background by default, which objects snap to when positioned. To hide or show the grid, use the {Grid Toggle} (CTRL+I) button at the left of the toolbar. When disabled, objects can be freely positioned without snapping.
Zoom
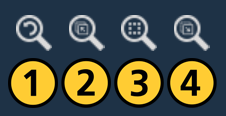
The zoom tools adjust the view of the magic sheet open in the editor.
| 1 | {Reset Zoom}(CTRL+0) | Centers the display and returns to the default zoom level. |
| 2 | {Zoom to All}(CTRL+1) | Senters the display and returns to the default zoom level. |
| 3 | {Zoom to Selection}(CTRL+2) | Shows all selected objects. |
| 4 | {Center on Selection}(CTRL+3) | Centers the display on the selected objects without changing the zoom level. |
Alignment and Distribution

These tools adjust the physical positions of the objects in the magic sheet.
{Create Array}
![]()
The array tool creates arrays of a selected object. With the object selected, use {Create Array} to open a pop-up menu to define the array shape and size.
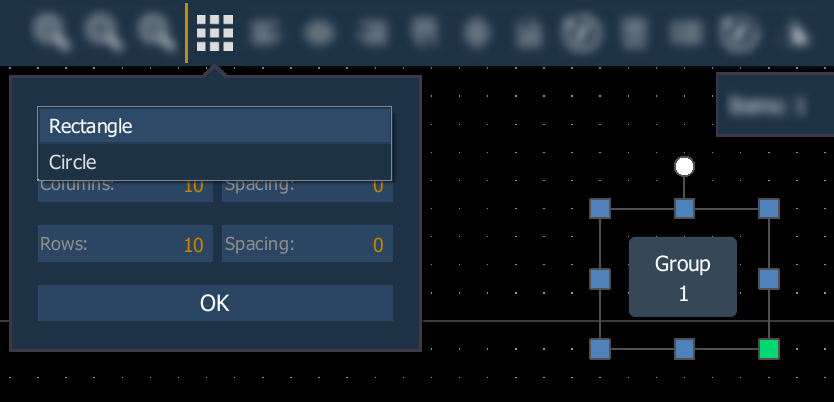
- Rectangle - creates an array of the selected object in a rectangle. Enter the number of Columns and Rows, and the Spacing between each.
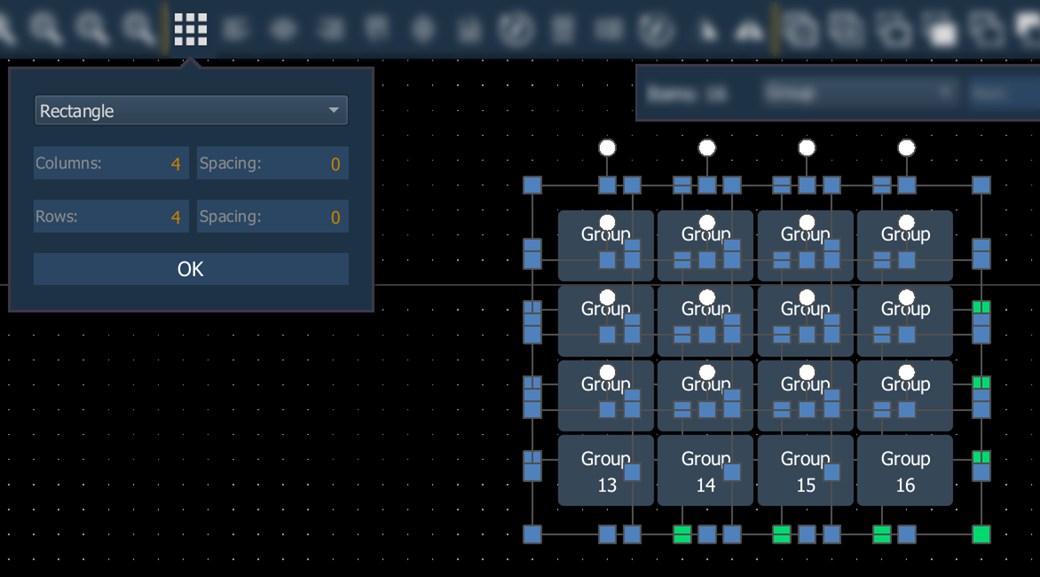
- Circle - creates an array of the selected object in a circle. Enter the Count of objects and the Size of the circle.
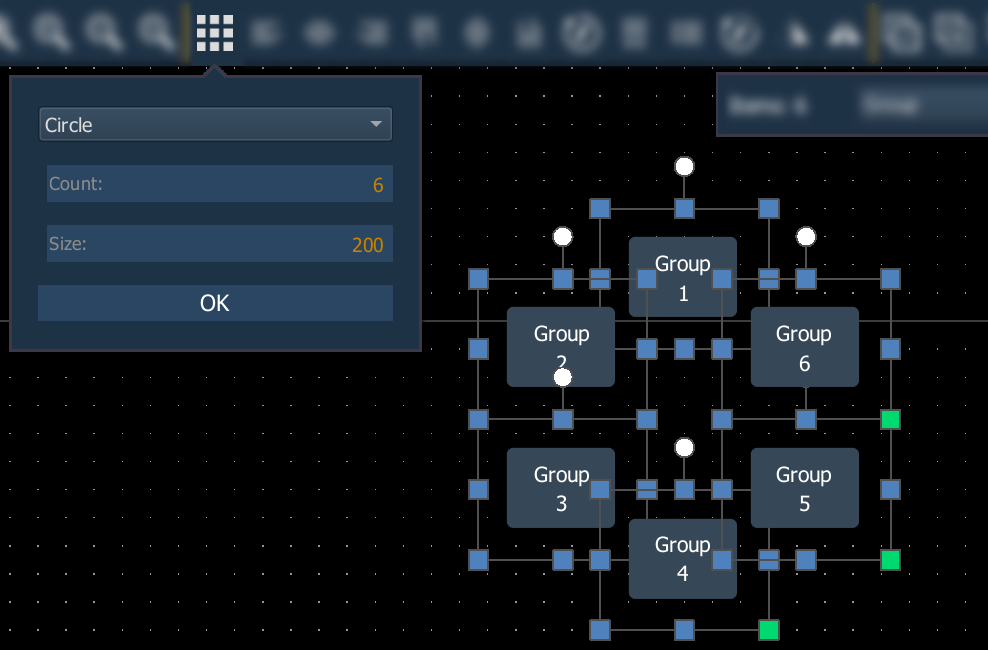
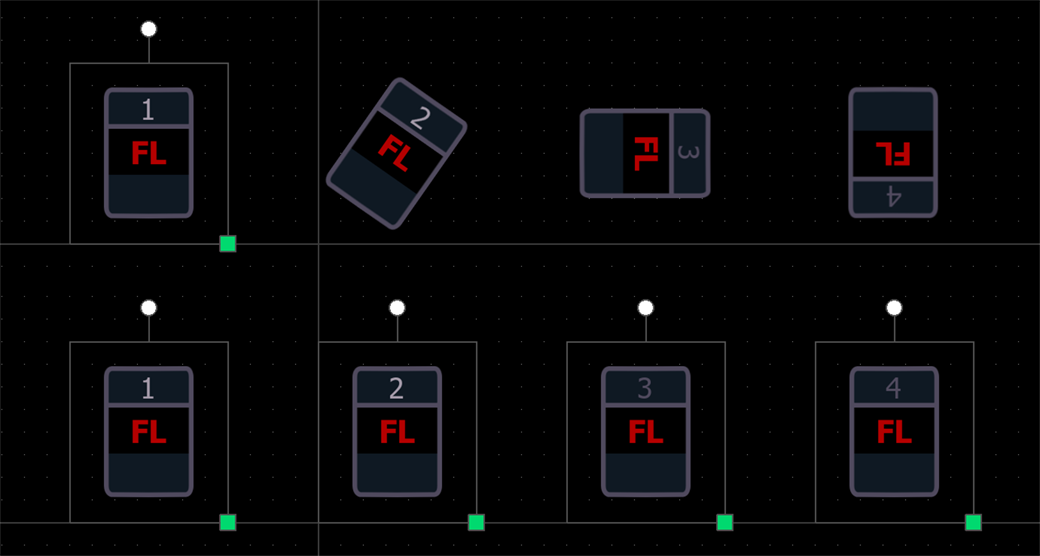
Arrays increment the object being arranged, rather than duplicating. For example, using a Group 1 button to create an array of six adds buttons for Group 2 through Group 6, not five additional Group 1 buttons.
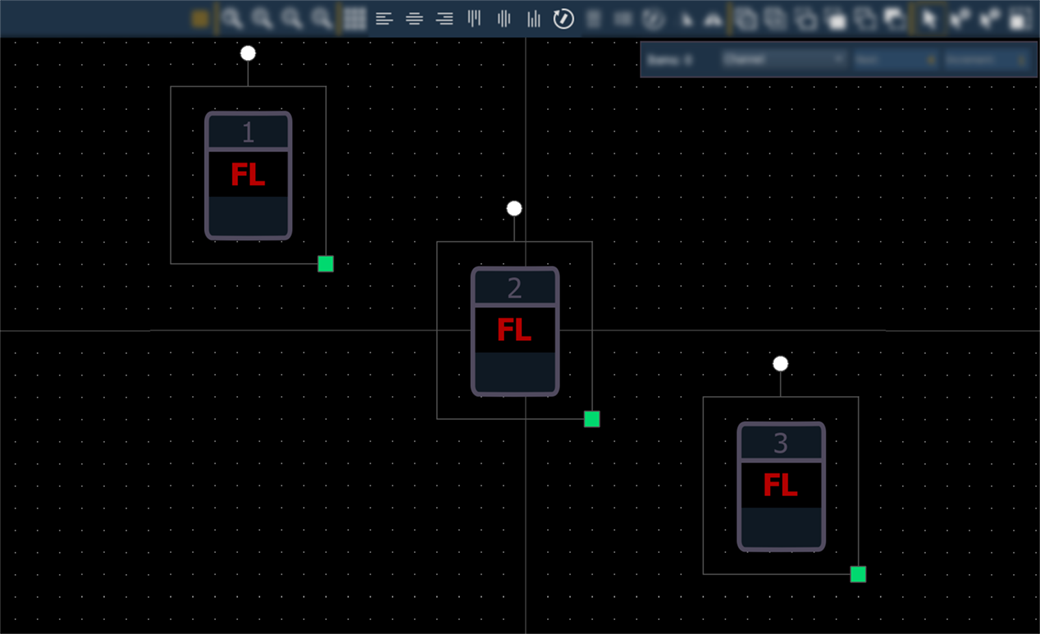
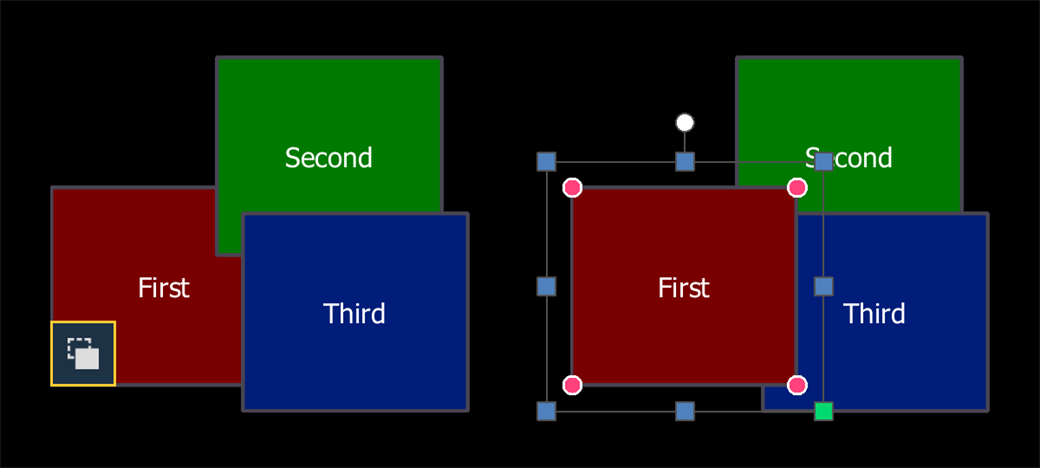
Align

These tools alter the position of selected objects relative to a common point.
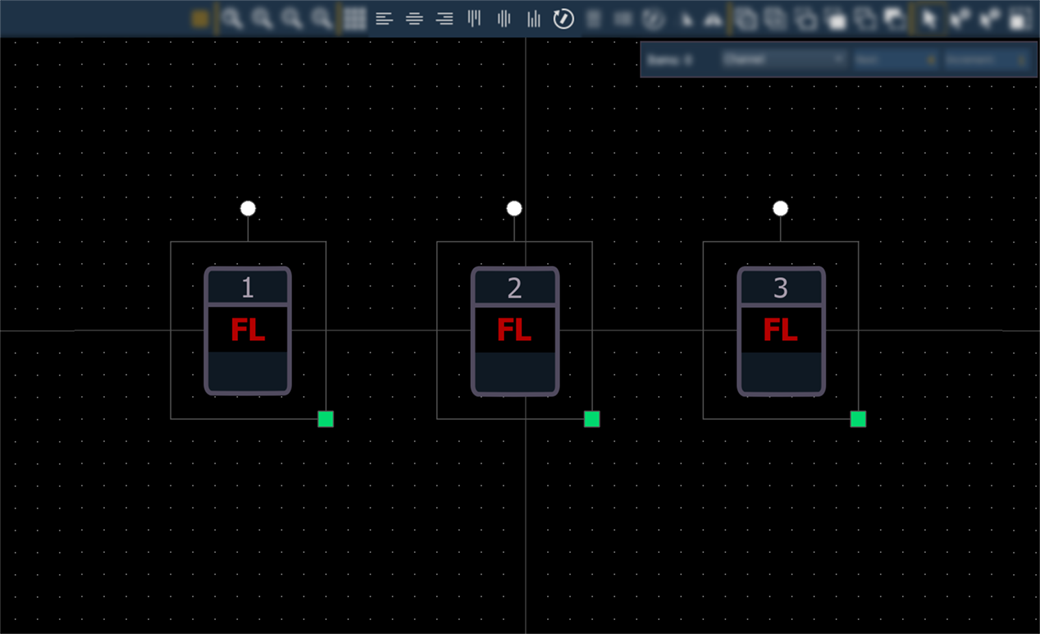
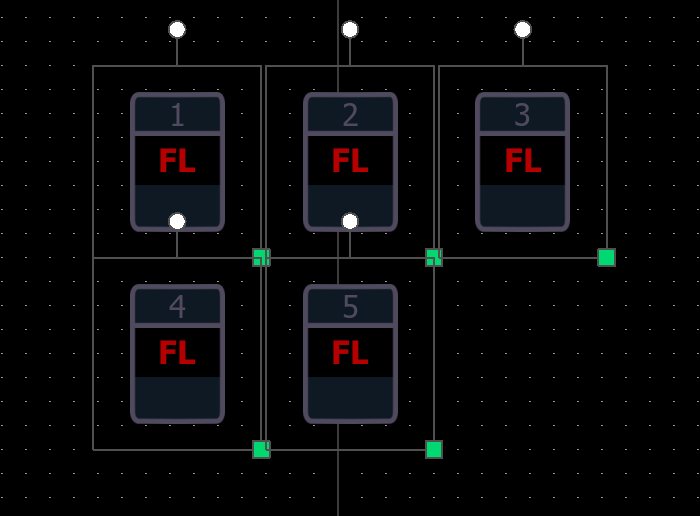
The example images below are relative to the following starting arrangement of three Tombstone objects:
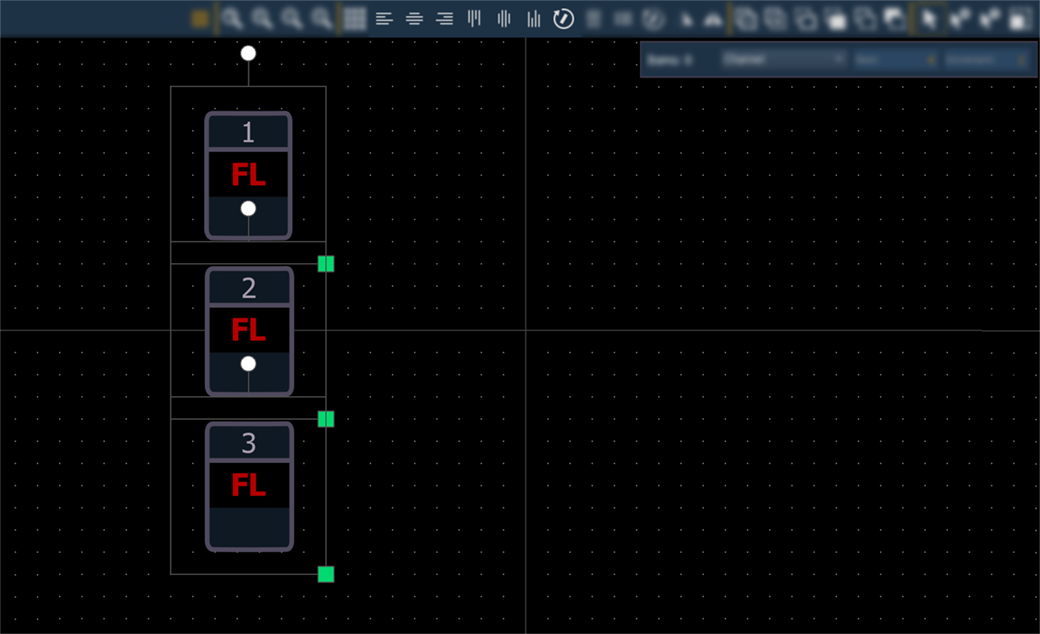
{Align Left}
![]()
Aligns selected objects with the furthest left object's left side.
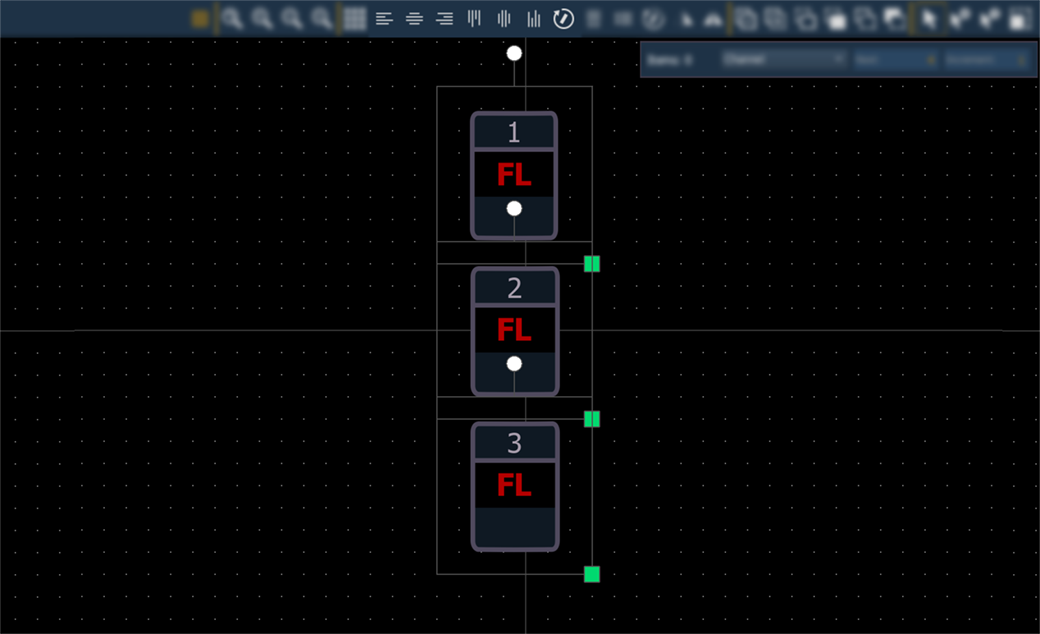
{Align Center}
![]()
Aligns selected objects vertically with the most central object.
{Align Right}
![]()
Aligns selected objects with the furthest right object's right side.
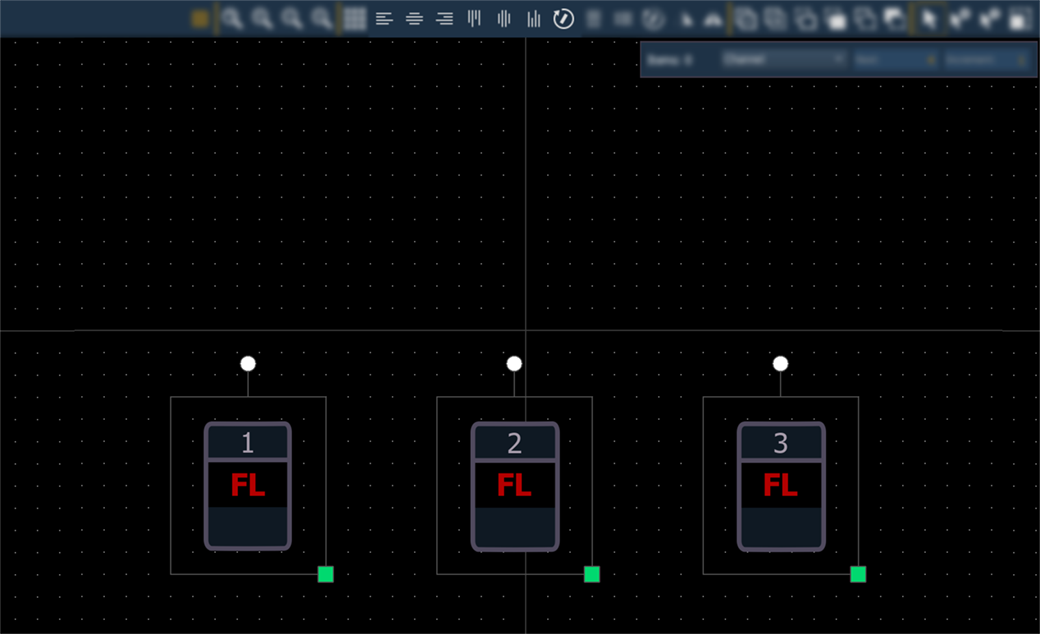
{Align Top}
![]()
Aligns selected objects with the highest object's top side.
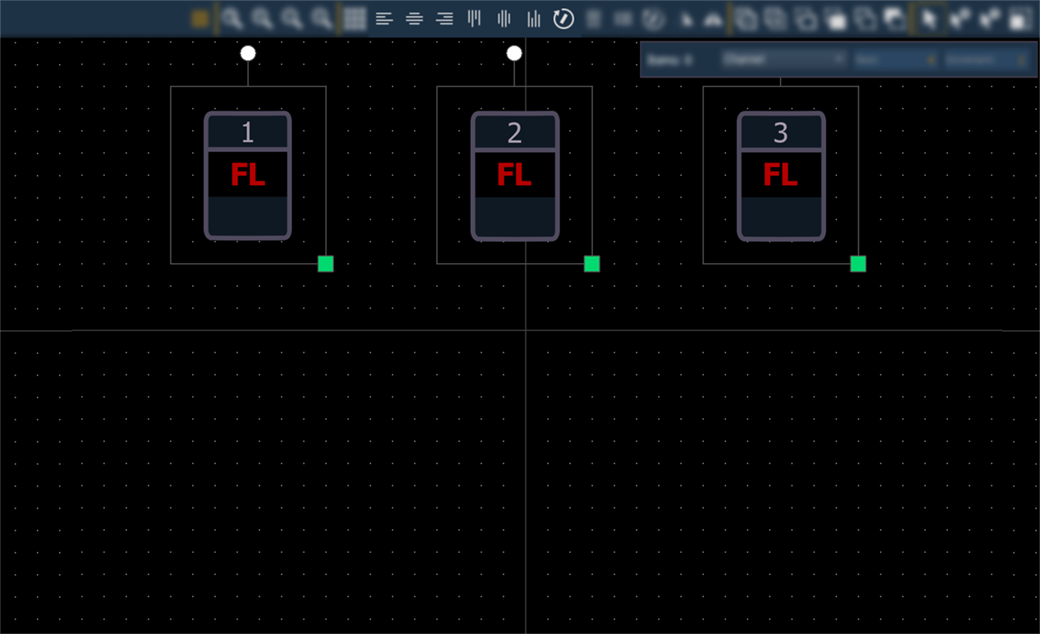
{Align Middle}
![]()
Aligns selected objects horizontally with the most central object.
{Align Bottom}
![]()
Aligns selected objects with the lowest object's bottom side.
{Align Rotation}
![]()
Aligns the rotation of selected objects with the rotation of the first object selected.
For example, a channel 1 tombstone is straight and tombstones for channels 2 through 4 are rotated. If the tombstones are selected in order, aligning rotation will straighten channels 2 through 4 to align them with the rotation of channel 1.
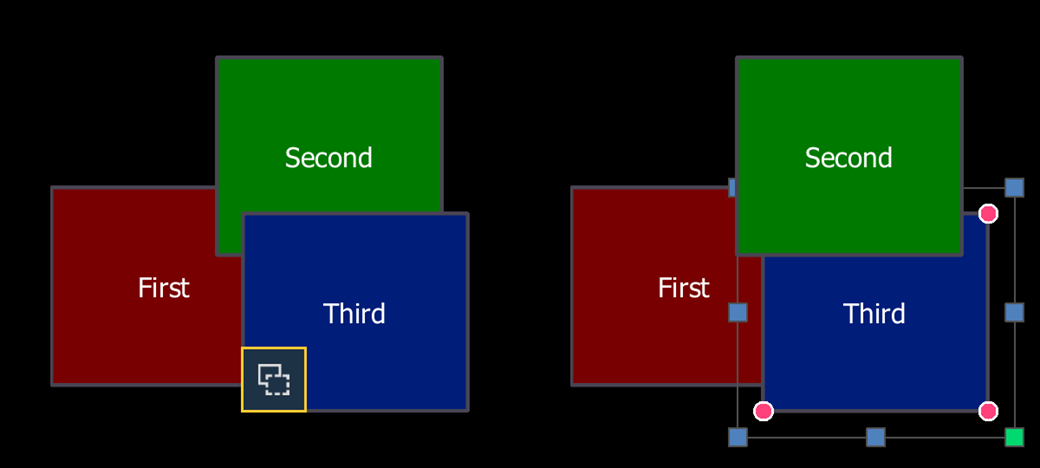
Distribute

These tools alter the position of selected objects based on the distance between them.
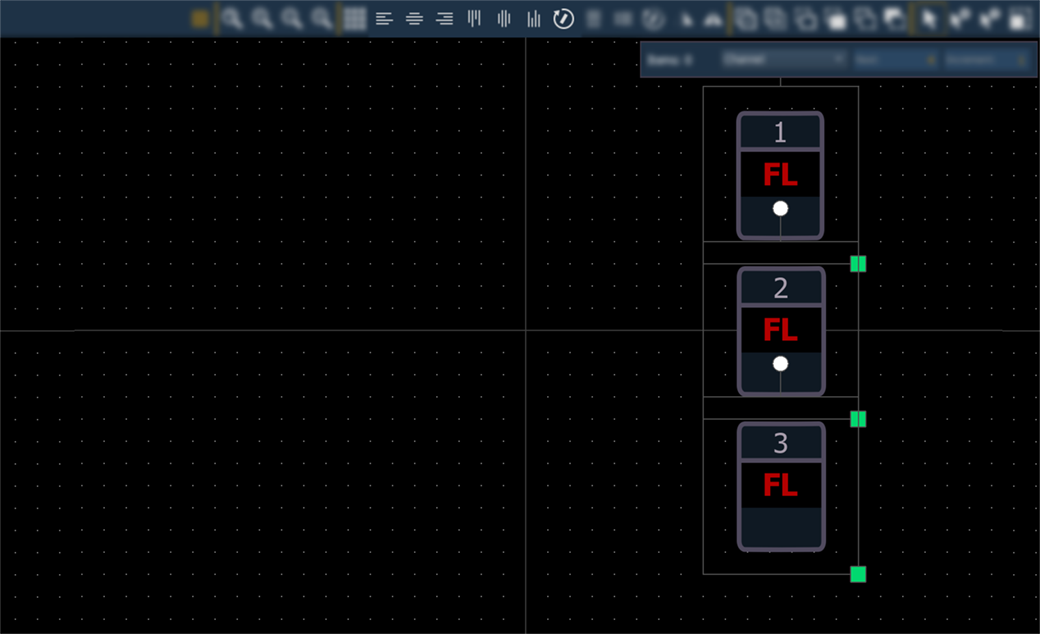
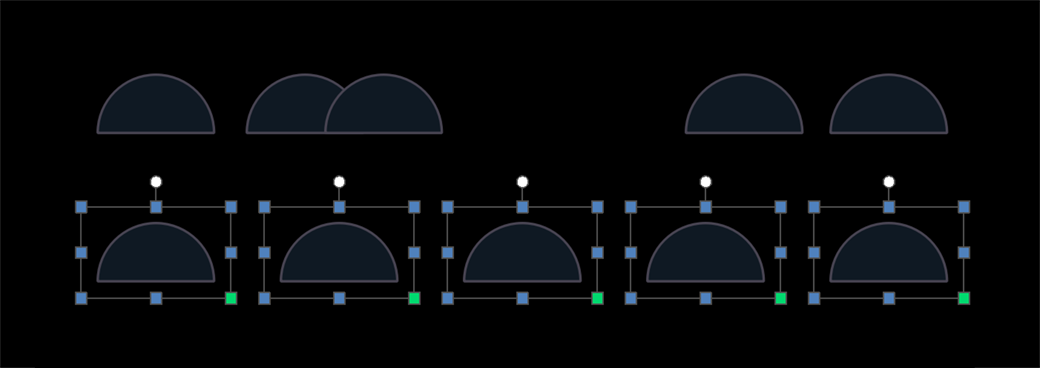
{Distribute Horizontally}
![]()
Distributes selected objects at equal horizontal distances between the furthest left and furthest right objects.
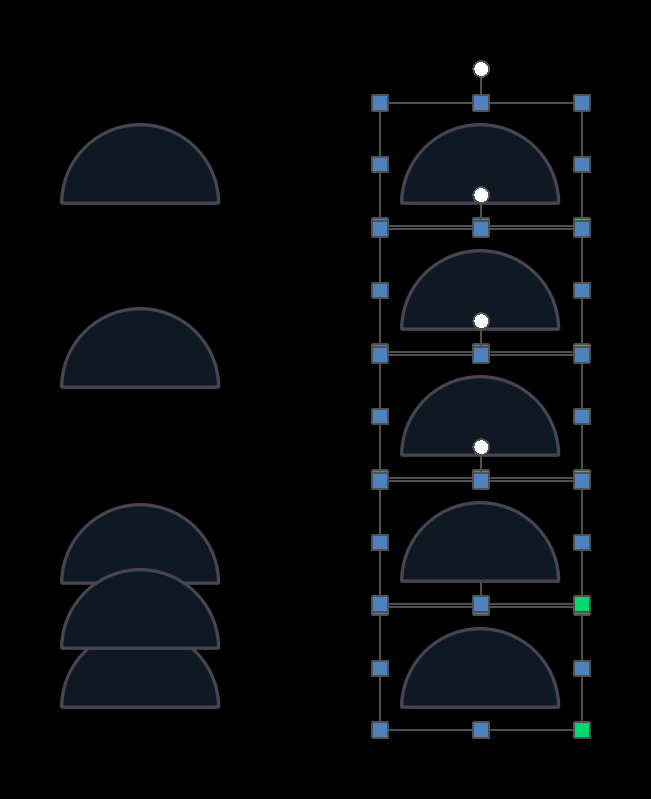
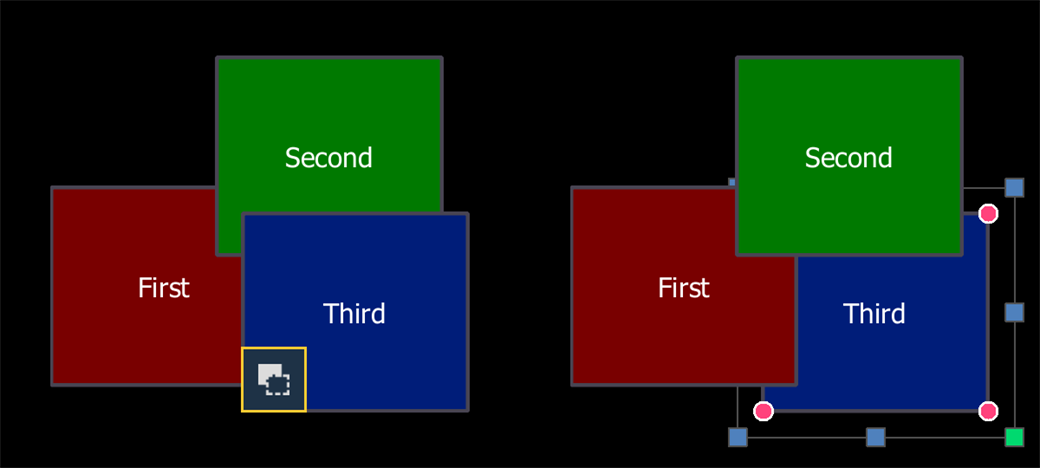
{Distribute Vertically}
![]()
Distributes selected objects at equal vertical distances between the highest and lowest objects.
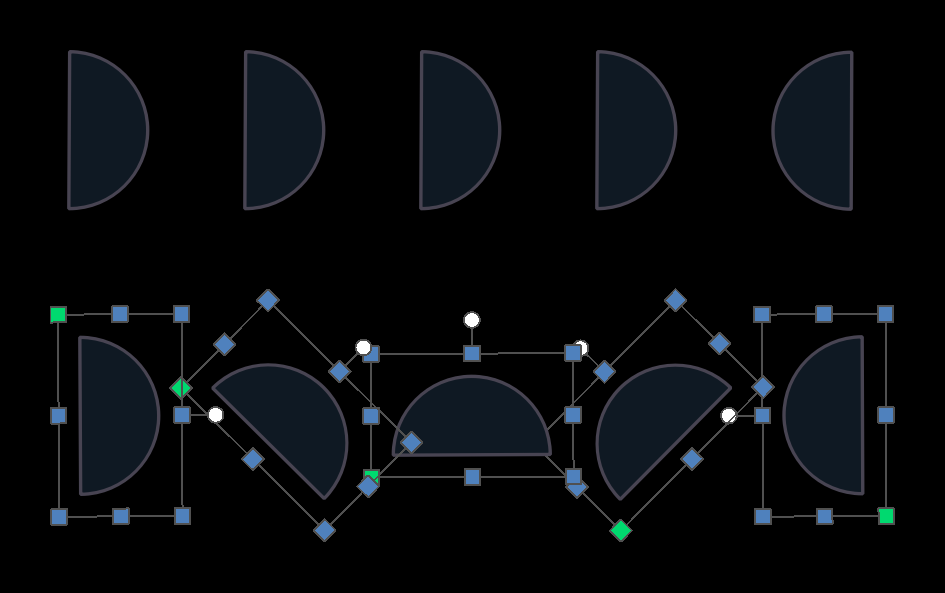
{Distribute Rotation}
![]()
Evenly distributes the rotations of the selected objects between the angle of the furthest left object and the angle of the furthest right object.
For example, four objects in a line are not rotated and the fifth is rotated. Distributing rotation will space the middle three objects at 45, 90, and 135 degrees between the 0 degrees of the leftmost object and the 180 degrees of the rightmost object.
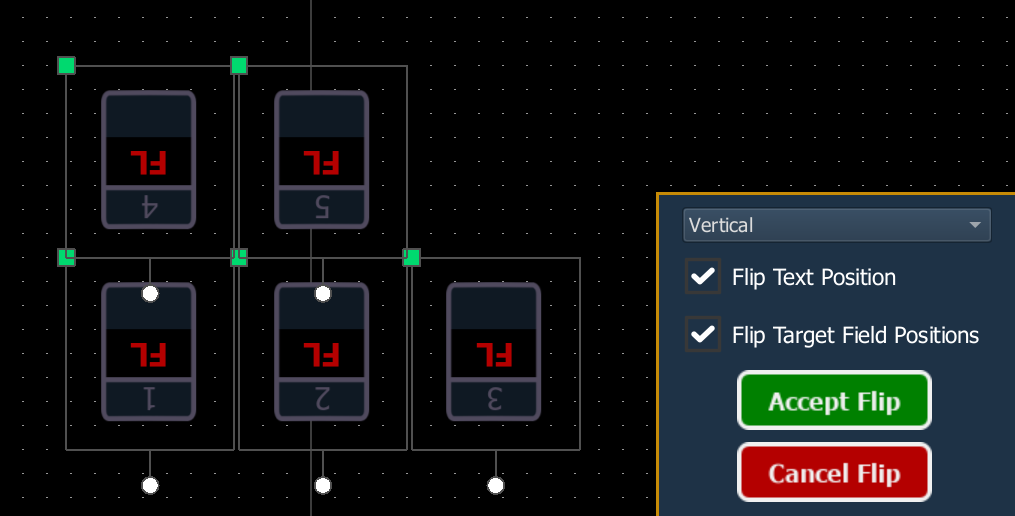
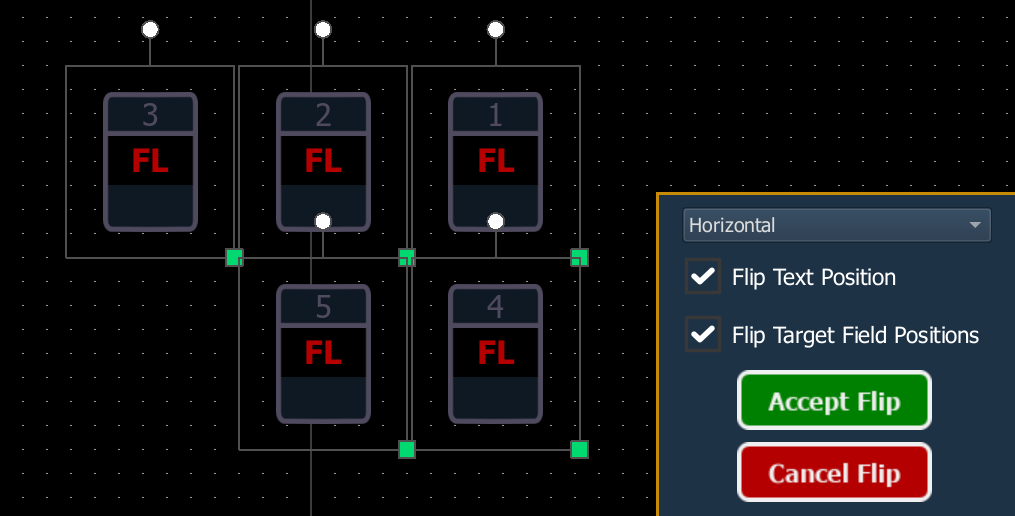
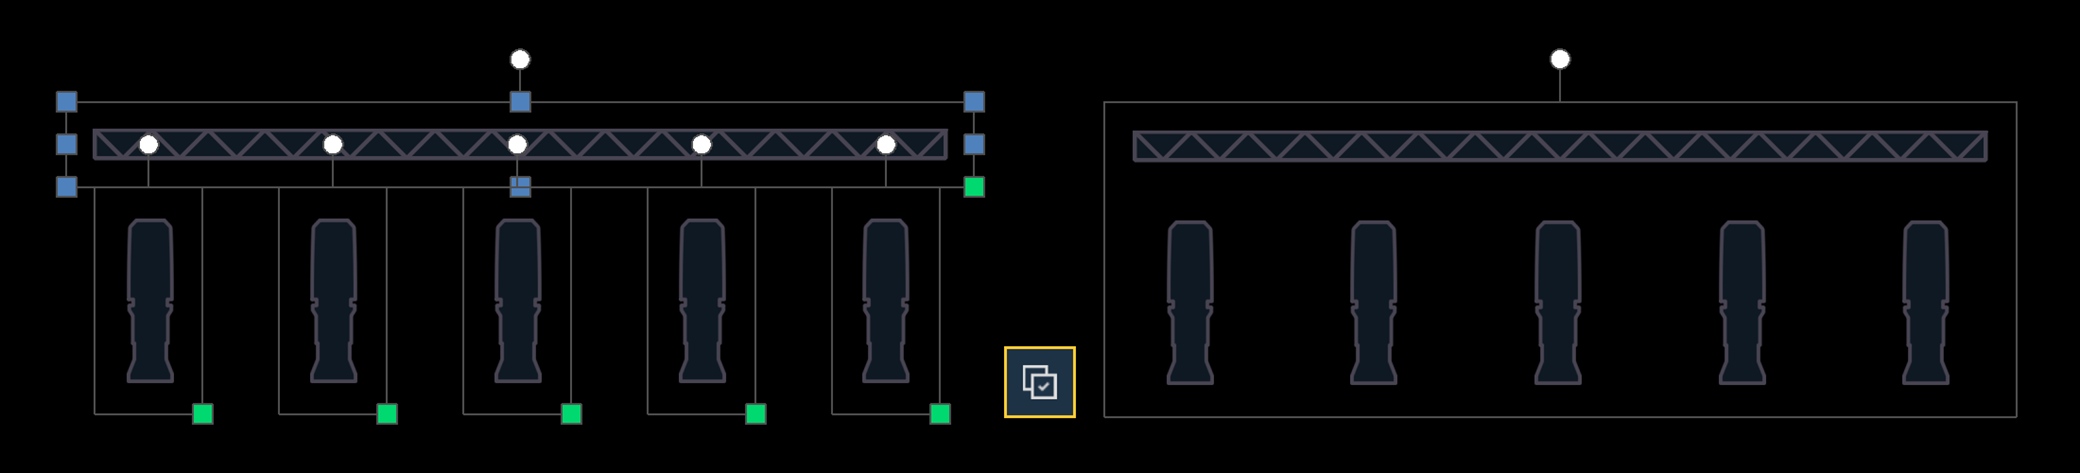
{Flip}
![]()
Reverses the positions of one or more selected objects horizontally or vertically.
New positioning is previewed as soon as {Flip} is used. Select {Accept Flip} to apply the results, or {Cancel Flip} to close the flip options without making changes.
- Vertical (CTRL+F) - repositions the selection across a vertical axis.
- Horizontal (CTRL+SHIFT+F) - repositions the selection across a horizontal axis.
- Flip Text Position - repositions object Text when flipping the object and its target fields. Enabled by default.
- For example, presets 1 through 3 are assigned to buttons with text in the top left corners and Fields identifying the preset in the bottom left. When this option is enabled, the text moves to the top right of the buttons in their flipped positions.

- When disabled, the text remains in the top left of the buttons in their flipped positions.
- For example, presets 1 through 3 are assigned to buttons with text in the top left corners and Fields identifying the preset in the bottom left. When this option is enabled, the text moves to the top right of the buttons in their flipped positions.
- Flip Target Field Positions - repositions object target Fields when flipping the object and its text. Enabled by default.
- In the same example, when this option is enabled, the target fields move to the bottom right of the buttons in their flipped positions. When disabled, the target fields remain in the bottom left of the buttons in their flipped positions.
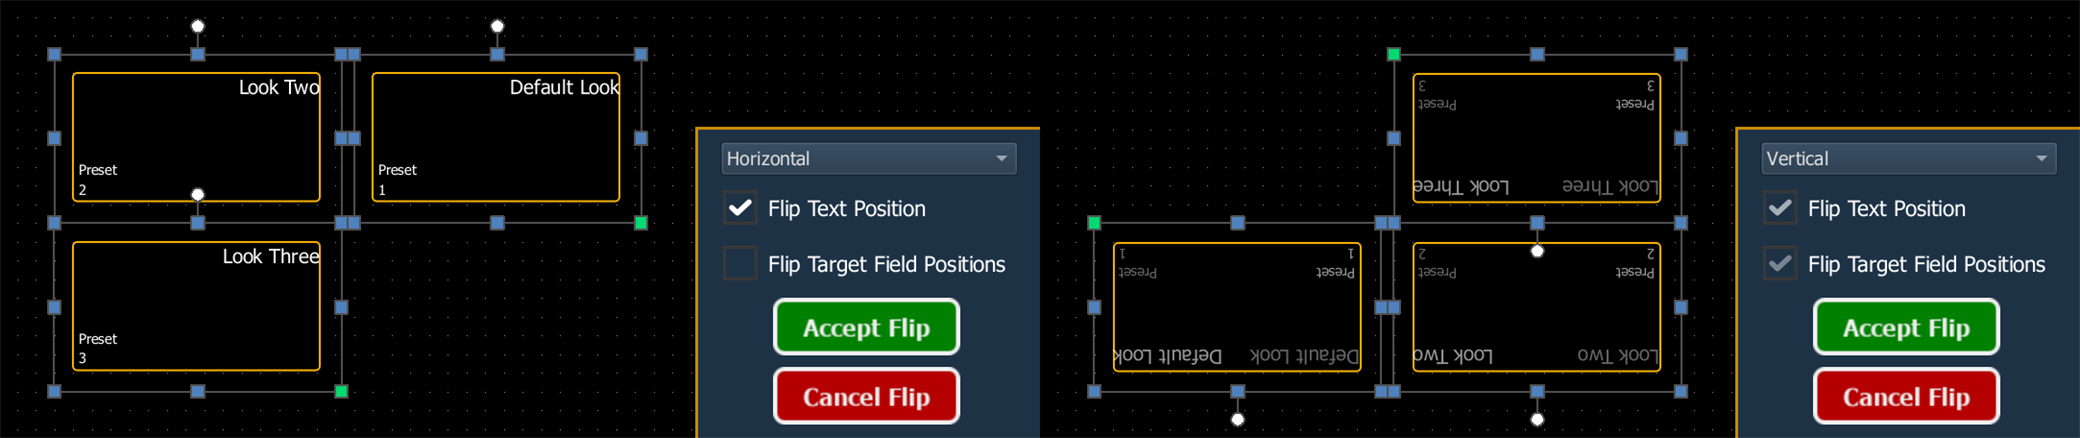
- In the same example, when this option is enabled, the target fields move to the bottom right of the buttons in their flipped positions. When disabled, the target fields remain in the bottom left of the buttons in their flipped positions.
{Mirror}
![]()
{Mirror} (CTRL+M) duplicates one or more selected objects, mirroring them across a chosen axis.
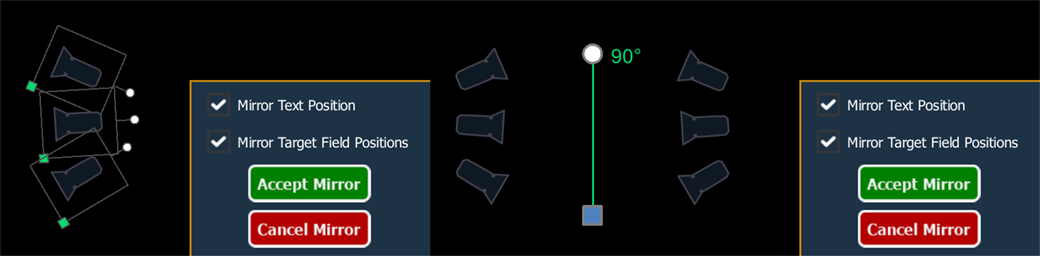
Select the desired objects, and use {Mirror} (CTRL+M) to open the mirror dialog in the bottom right of the editor. Click or touch and drag to draw a green line across which the objects will be mirrored, with rotation and movement Object Handles. The current axis angle is displayed by the rotation handle (white circle).
New positioning is previewed as soon as an axis is drawn. Use the rotation handle to change the angle of the axis.
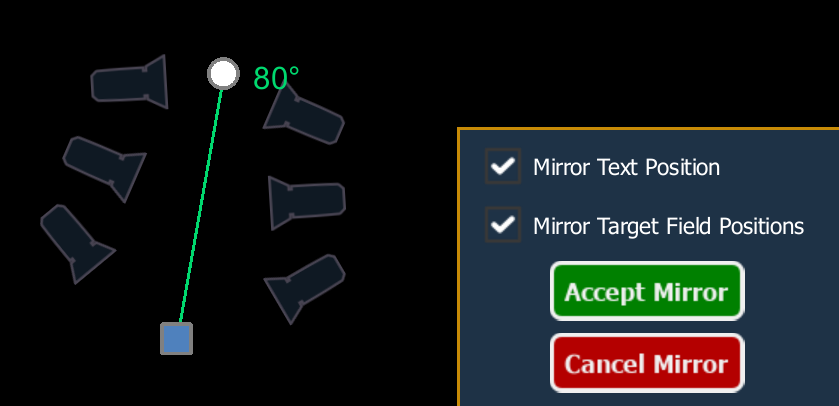
Use the movement handle (blue square) to adjust the position of the axis. Move the axis closer to the original objects to bring the previewed mirrored objects closer, or move the axis further away to create more space between the original and mirrored objects. The axis can be moved anywhere along its own angle without affecting the position of the previewed objects.

Select {Accept Mirror} to apply the results and duplicate the selection across the axis, or {Cancel Mirror} to close the mirror dialog without making changes.
Group and Order

The order tools adjust the relationships between the objects in a magic sheet.
{Group}
![]()
{Group} (CTRL+G) associates multiple selected objects so that they can be moved and rotated like a single object.
{Ungroup}
![]()
{Ungroup} (CTRL+SHIFT+G) removes the association from any selected grouped objects.
{Bring Forward}
![]()
Moves the selection above the next object up.
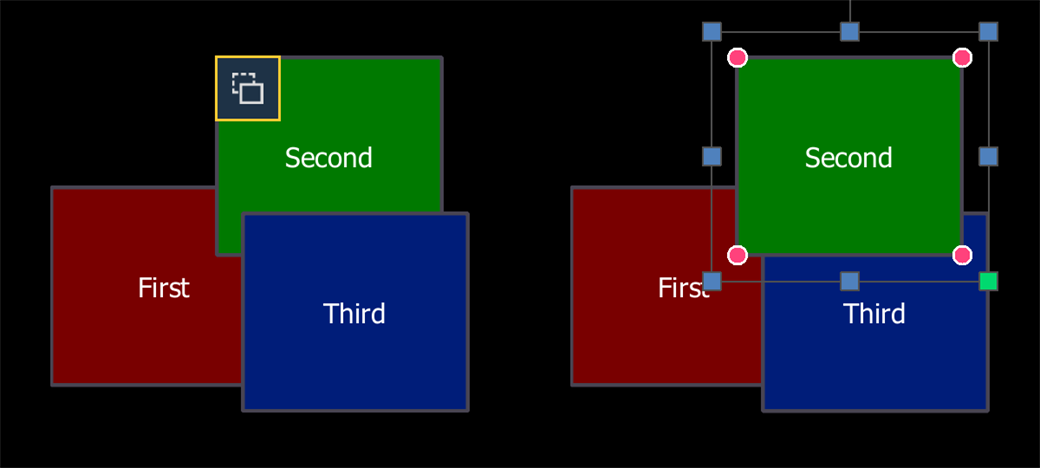
{Bring to Top}
![]()
Moves the selection above all other objects.
{Send Backward}
![]()
Moves the selection below the next object down.
{Send to Bottom}
![]()
Moves the selection below all other objects.
Layout
The layout tools affect how objects can be added to a magic sheet from the Magic Sheet Object Library.
Target Bar
The target bar is always visible below the toolbar, indicating a target type, the target number that will be used for the next object, and the increment used between those target numbers.

- Items - the quantity of currently selected objects on the magic sheet.
- Target - the {Target} type of the currently selected objects, the intended target type to add objects with {Quick Layout}, or the desired target type to assign when using {Renumber}. The target can be changed via the dropdown menu.
- Selecting one or more objects on your magic sheet will indicate their target type in this field.
- If multiple target types are selected, the most common target type in the selection will be indicated.
- If an equal number of different target types are selected, the target type of the most recently selected object will be indicated.
- Next - the target number that will be used for the next object added to the magic sheet.
- Increment - the offset between the current target number and the next target number to be used.
The Next and Increment fields can be edited for use with {Quick Layout} and {Renumber}.
Modes

The magic sheet cursor modes allow you to add and interact with objects in various ways. The current cursor mode will be outlined in gold.
{Normal}
![]()
{Normal} (CTRL+E) is the default cursor mode for arranging and interacting with objects in the editor.
{Quick Layout}
![]()
{Quick Layout} allows you to select an object from the Magic Sheet Object Library and place multiple instances of that object on your magic sheet.
The Next and Increment fields in the target bar can be used to adjust the numbering of the new objects.
Use the {Done} button or choose another layout option to exit quick layout mode.
{Renumber}
![]()
{Renumber} (CTRL+SHIFT+R) floats a preview of the next incremented target number as defined by the target bar. Click on an object to change its target number. The floating preview will increment, allowing you to continue renumbering.
- Use the target bar to select the desired target type from the dropdown menu, editing the Next and Increment fields if necessary.
- Select any object on the magic sheet with the cursor to change it to the target type and number defined by the target bar. Selecting objects with no target type selected will remove their target.
- Use the {Done} button or choose another layout option to exit renumber mode.
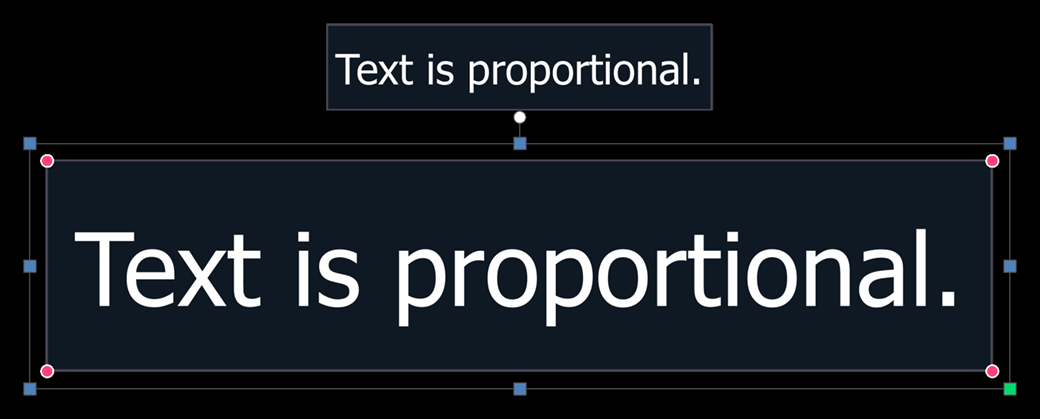
{Stretch}
![]()
{Stretch} (CTRL+S) resizes object Text proportionally when the object is scaled. You can also proportionally resize by holding CTRL while scaling up or down.
In {Normal} mode, objects can be made larger or smaller without the font size changing.
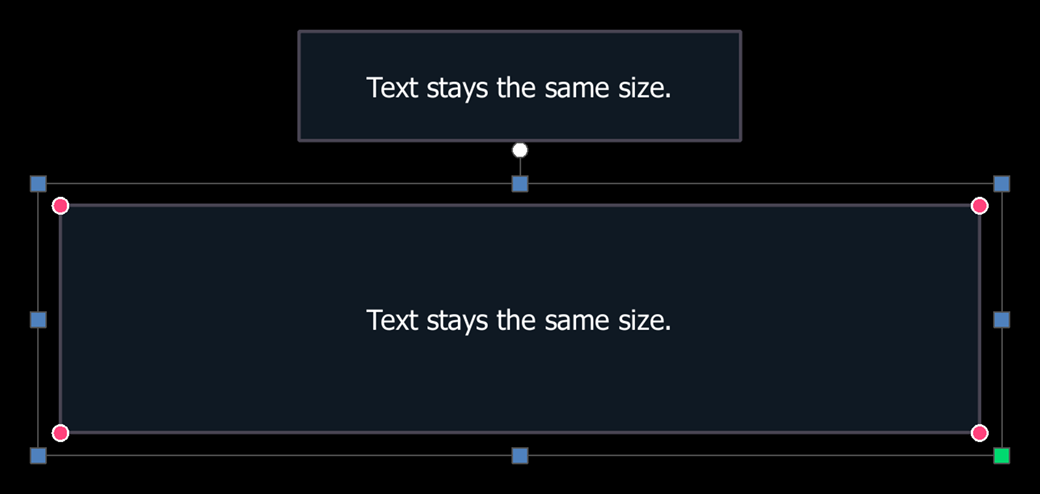
In stretch mode, the font size will scale up or down to proportionally match the size of the object.