
Toolbars
Two toolbars in the application are provided including the configuration and the controls toolbar.
Configuration Toolbar
The configuration toolbar is located at the top of the display, beneath the menu. You can change the location of the toolbar at any time using the same method as moving a docked window.

Many of the tools in this configuration toolbar are used to organize controls on a page such as workspace, moving a control up or down in the stacking order, aligning controls, locking a controls position, laying out controls, displaying a grid on the Page workspace and simulating a controls function.
New, Open, and Save
Clicking [New], opens the New Configuration dialog. Clicking the [Open] button opens the default file location where configurations are stored. Clicking the [Save] button saves the current configuration. Saving a configuration for the first time opens a "Save A" dialog.
Undo / Redo
Reverse and redo the most recent actions in the configuration using the "Undo" and "Redo" features. The Undo/Redo history is cleared when a configuration is closed. To undo a recent action or multiple recent actions:
- Select (Edit) "Undo" from the menu.
- Click the [Undo] button located in the toolbar.
- Use the alphanumeric keyboard shortcut (Ctrl) + (Z).
To redo or repeat the most recent action that you reversed in a file:
- Select (Edit) "Redo" from the menu.
- Click the [Redo] button located in the toolbar.
- Use the alphanumeric keyboard shortcut (Ctrl) + (Y).
Workspace Zoom
The workspace zoom tools allow incremental zoom of the selected page workspace.

- Select the [Zoom In] button to increase the magnification of the page workspace.
- Select the [Zoom Out] button to decrease the magnification of the page workspace.
Tip: Alternatively, use a keyboard shortcut to zoom the workspace. Press and hold (Ctrl), then press the (-) or (+) button, or use the scroll wheel on your mouse, to increase and decrease the workspace zoom level.
Simulate and Stacking Order
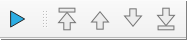
The [Simulate] button  places ControlDesigner in simulation mode, where you can verify the intended functionality of your programmed touchscreen configuration.
The next four buttons in the toolbar are used for setting the stacking order of controls. From left to right the tools include [Front], [Raise], [Lower] and [Back].
Lock Positions and Align

The [Lock Positions] button  allows you to lock the entire page of controls down, so that they cannot be moved from their current locations on the page, although you can still change the stacking order.
The next buttons in the toolbar are used to align multiple selected controls to a plane. From left to right the tools include [Align Left], [Align Right], [Align Center], [Align Top], [Align Middle], [Align Bottom].
Layout, Spacing, and Grid

The layout tools allow you to change the layout of selected controls to a vertical or horizontal plane, or to a grid pattern with specified spacing.
In addition, the [Show Grid] button, when enabled, displays a grid on the page and allows for user customization of the grid spacing.
Controls Toolbar

The controls toolbar is located above the Page workspace by default. The controls toolbar is split between parent objects and controls. Selecting any tool, other than the [Select Mode] or [Add Page] tools from the toolbar places the Page workspace into draw mode.
While in draw mode you cannot select objects or controls, instead you must use the mouse to draw the selected parent object or control on the page. The Property Editor displays the properties for the selected object or control once it has been drawn.
Reference Controls for more information.
Status Bar
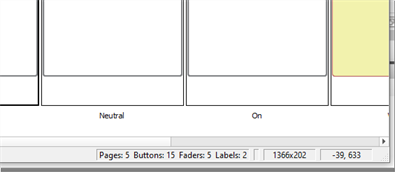
The status bar is located in the bottom right corner of the application window and displays a subset list of object counts, the size of the control, and the X, Y coordinates of the current mouse cursor location in the workspace.