I/O Gateway "Identity" Tab
The "Identity" tab of the I/O Gateway Configuration dialog displays the general settings for Net3 I/O Gateways.
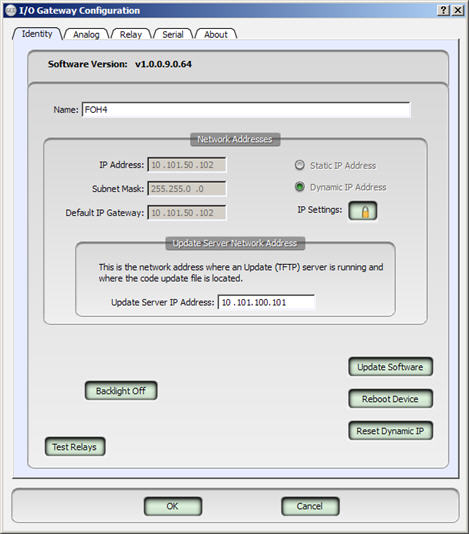
This displays the current full version number of software loaded in the gateway for reference only. The first three digits (1.0.0) are considered the normal software version number and the last three digits are ETC's internal development numbers.
The name of the gateway device can be changed here. The default name is blank therefore if no name is provided, the physical gateway hardware will display its IP address on the LCD.
Tip: TIP: Be aware, the gateway LCD is only capable of displaying the first 20 characters of a name. You can assign a name that is longer, but it will be truncated by the display.
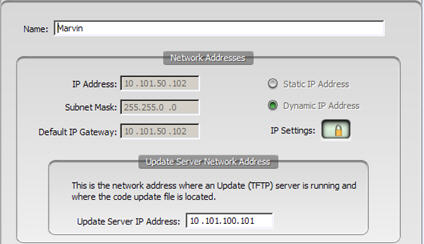
IP addresses are not editable, and display with a gray background, unless you have enabled IP editing by entering the password and the IP mode is set to "Static".
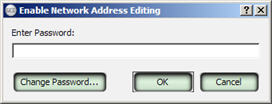
Enable IP editing by clicking on the button with the padlock icon ![]() . An "Enable Network Address Editing" dialog displays. Enter the password and click [OK] or change the password from this dialog.
. An "Enable Network Address Editing" dialog displays. Enter the password and click [OK] or change the password from this dialog.
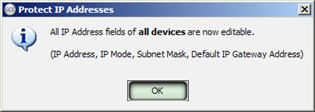
When network address editing has been enabled, you can change the settings for Static IP address and Dynamic IP address.
- If you choose to edit the Static IP Address, you can edit the network address fields of IP address, Subnet mask and Gateway IP address.
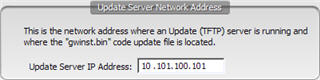
The "Update Server Network Address" section of the "Identify" tab is the network address used by the Net3 I/O Gateway (if chosen in the update software dialog) to request software from a TFTP server (update service) that is expected to be running at that IP address.
Note: When editing an "Online Devices" table row, selecting any of the following buttons, [Backlight Off], [Update Software], [Reboot Device] or [Reset Dynamic IP] causes that action to perform immediately on the selected online gateway.
Note: This button is only active for the gateway selected from the "Online Devices" table.
Clicking the [Backlight Off] or [Backlight On] button is actually a toggle button which sends a command to turn on or turn off the LCD backlight on the front of the selected online gateway. The button text displays the action that will be taken when clicked .When the backlight is turned off, it will still illuminate for menu button presses on the front panel of the gateway.
Note: This button is only active for the gateway selected from the "Online Devices" table.
Clicking the [Update Software] button tells the selected devices to get new software from the IP address specified in the Update Server Network Address field. When the software is finished loading, the gateway will reboot into the new software environment.
Note: This button is only active for the gateway selected from the "Online Devices" table.
Clicking the [Reboot Device] button sends a message to the selected gateway telling it to reboot. This is a soft-reboot only and will cause the dialog to immediately close.
Note: This button is only active for the gateway selected from the "Online Devices" table.
Clicking the [Reset Dynamic IP] button deletes the current Dynamic IP address information and reboots the selected gateway. When the gateway reboots, a request is sent to the DHCP server for a new dynamic IP address (renewing the DHCP Lease). This will cause the dialog to immediately close.
The [Test Relays] button is displayed only when you are editing an online I/O Gateway. Clicking the [Test Relays] button opens a "Test Relays" dialog.
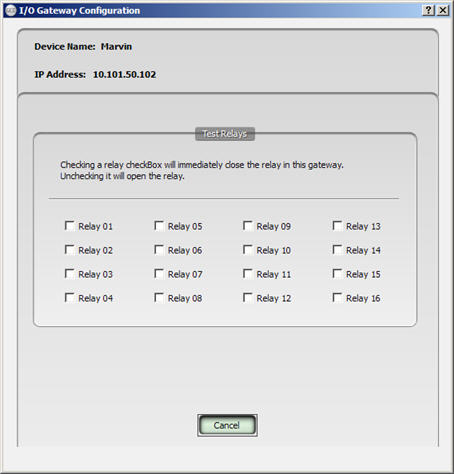
This dialog displays a snapshot of the state of each relay as of the last time GCE read information from the selected I/O gateway. Clicking any of the relay checkboxes immediately opens or closes the associated relay. Closing this dialog returns all of the related relays to their previous state prior to opening this window.
|
|
|---|
