Preferences
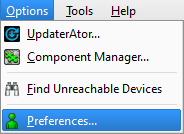
Select Preferences from the Options menu to open the Preference dialog. This dialog is divided into three tabs of settings; General, Network Access, Units and Display, and Display Theme.
The General tab offers general ETC Concert application settings :
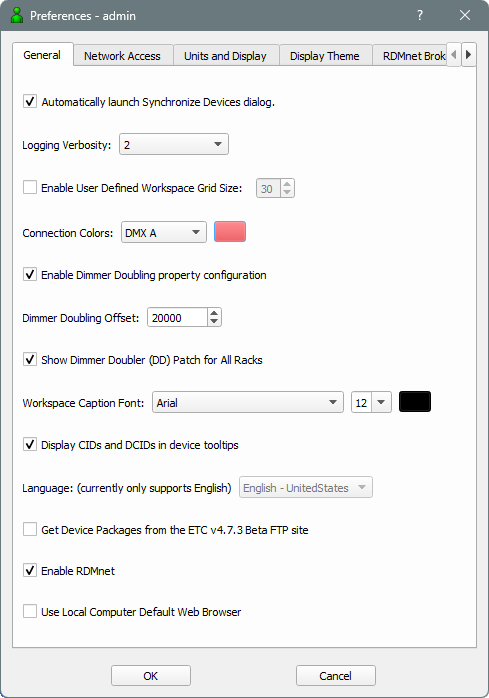
- Automatically launch Synchronize Devices dialog: This checkbox is selected by default and controls whether the "Synchronize Devices" dialog displays automatically when devices are detected as going out of sync.
- Logging Verbosity: Select the level of application logging messages you want written to the Concert log file.
Note: This setting should only be changed if advised to do so by ETC Technical Services.
- Enable User Defined Workspace Grid Size: Select a custom workspace grid size (in pixels) from the selection box.
- Connection Colors: Customize the data connection point color (e.g. DMX A, DMX B, Ethernet, etc.) that displays as the connector lines between devices in the workspace. These connections are made automatically when the Network Map feature is used or added manually when using the Connection tool from the drawing toolbar.
- Enable Dimmer Doubling property configuration: Select the checkbox to enable dimmer doubling property configuration then define the default dimmer doubling value to be used by products that support dimmer doubling, such as the CEM3 and Gateways. By default, this value is set to 20000. This value is stored as a system preference.
- Show Dimmer Doubler (DD) Patch for All Racks: Select the checkbox to show the Dimmer Doubler patch columns in the Sensor3 Dimmer Properties mini-editor. By default, this is not selected.
- Workspace Caption Font: Select the font type, size and color that will be used for all device icons in the workspace. By default, this values is set to Arial type, size 12 pt, black color. This value is stored as a system preference that will be maintained through a Concert application restart.
- Display CIDs and DCIDs in device tooltips: Select the checkbox to enable the display of CIDs and DCIDs when hovering over a device in the workspace.
- Get Device Packages from the ETC v#.#.# Beta FTP site: Select the checkbox to get beta device packages when they are available.
- Enable RDMnet: Select the checkbox to enable RDMnet. When enabled, RDMnet is used to discover and interact with RDMnet capable devices.
- Use Local Computer Default Web Browser: Select the checkbox to use the web browser that is set to default on the local computer. When deselected, anything opened from Concert opens in the Concert built-in web browser.
The Network Access preference provides the access to change the selected network interface cards (NIC or adapter) for use with the configuration. The table displayed is similar to the Network Interface Selection table shown at the initial start up of Concert.

Tip: ETC lighting networks typically use a 10.101.x.x IP Address structure. A list of ETC product specific IP Addresses is available from ETC Technical Services.
A selected NIC displays with a selected checkbox, meaning a check mark displays in the checkbox. To deselect a NIC, click the checkbox, removing the check mark and leaving the box empty. ClickOK to process the change.
The settings in the Units and Display tab determine how ETC Concert displays certain quantities that have units, such as temperature and Streaming ACN values.
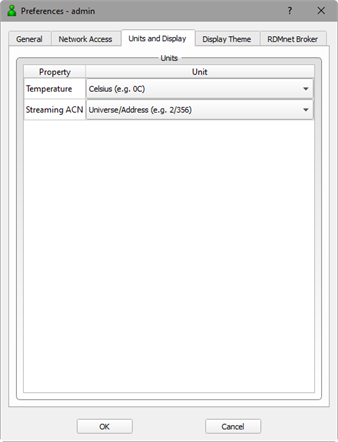
Temperature
By default, all temperature properties default to Fahrenheit. Alternatively, select Celsius from the drop-down field, then click OK to set the preference and close the preferences dialog. All represented values will change to reflect the changed selection preference.
Streaming ACN
By default, all Streaming ACN address properties default to Universe/Address (e.g. 2/356) where the 2 represents the universe (or port) and the 356 represents the address. Alternatively, select Absolute from the drop-down field to change the address property to an absolute value (e.g. 868). All presented values will change to reflect the selection preference.
Choose from the light or dark theme for your Concert display.
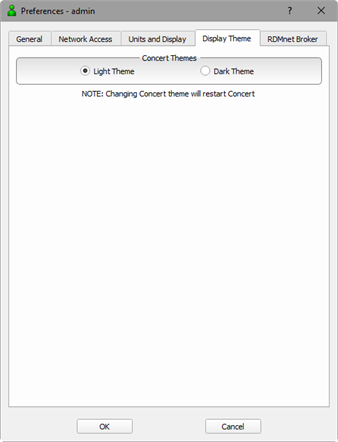
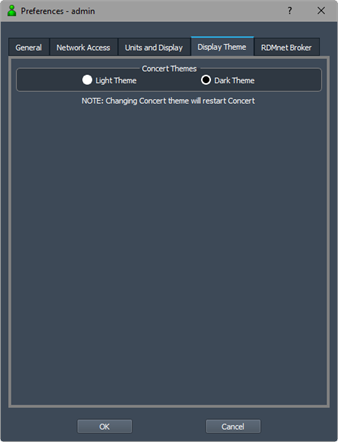
You can display the Concert user interface in a Light or Dark theme. The example screens shown in this online content display the Light theme.
Configure the RDMnet broker service functionality:
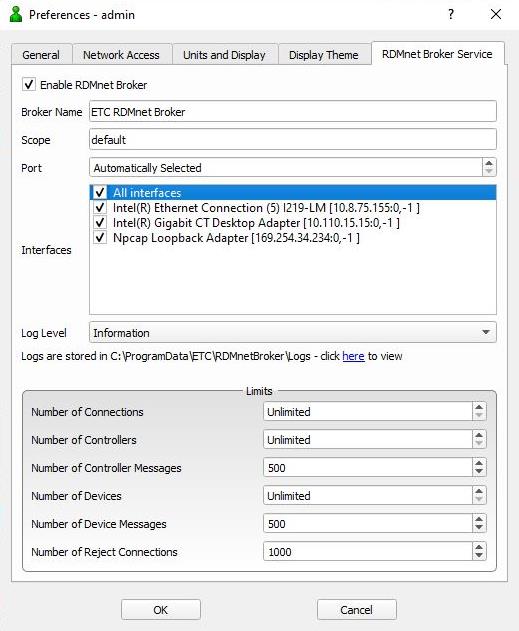
Enable RDMnet Broker: Select to enable the RDMnet broker installed on the device.
Broker Name: Enter the name of the broker service to identify it on the network. This can be up to 63 characters long. If left empty, a default name is assigned.
Scope: The scope for the broker service on this device. This is set to default automatically but can be up to 62 characters long, is case sensitive, and cannot be empty.
Currently, only default can be used for scope. Multiple scopes will be available in future versions of Concert.
Port: The port on which the broker service is run. Values can be entered from 1024–65535. The default is Automatically Selected.
Interfaces: List of all available network interfaces. Select individual or all interfaces for the RDMnet broker service to use.
Log Level: Select from the following options to determine your level of logging – Emergency, Alert, Critical, Error, Warning, Information, Debug.
Limits: Enter the limits of connections, controllers, and more. Setting an option to 0 returns Unlimited for all fields other than Number of Reject Connections.