Custom 3D objects can be imported into the Augment3d object library from the Using the Browser via File > Import > Augment3d Scenic Models.
For a full list of supported 3D file types, see Supported 3D File Formats.
Note: Custom objects can only be deleted from the Library if they are not used in the current model.
If a tether and a console are connected, objects must be imported from the tether device. Enter Edit Mode, and navigate to File > Import to Library > 3D Model to proceed with object import.
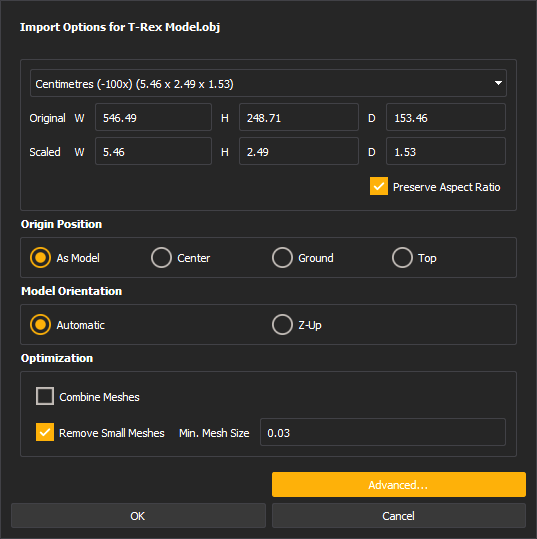
After a file is selected via the file browser, the Import Options panel will display.
Use the available options to configure the import to correctly represent your file in Augment3d.
Select the desired units to use for the size of the object being imported.
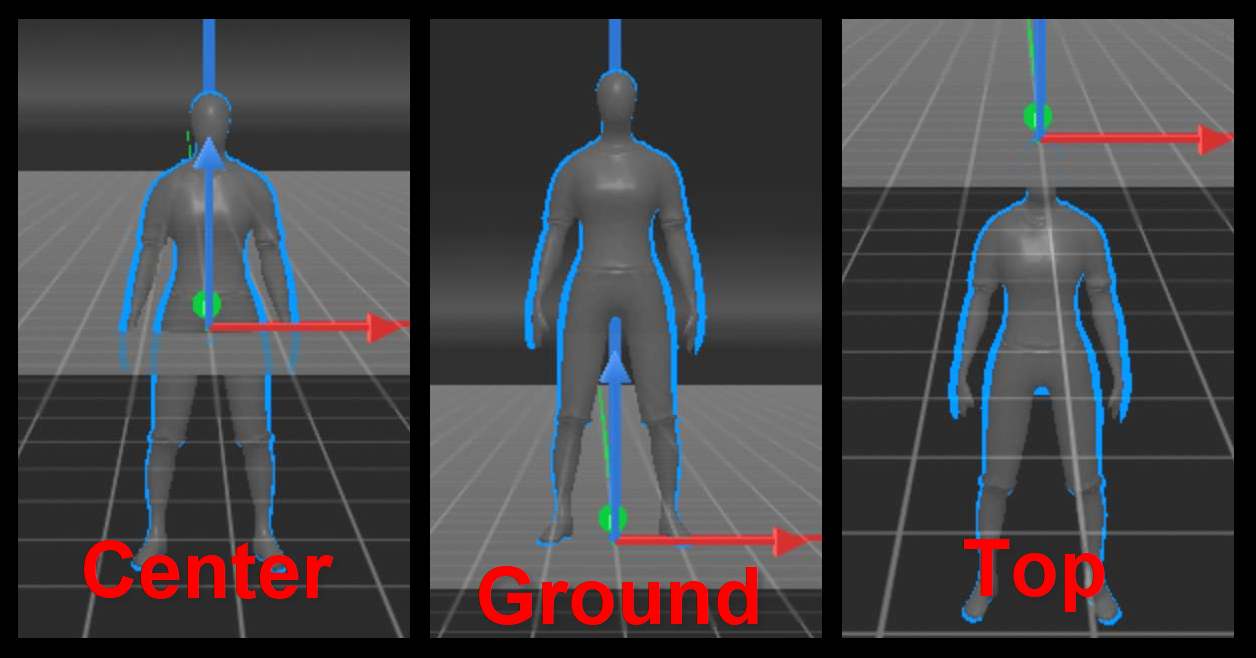
Determines the position of the object relative to the origin when added to the model from the Library.
Unlike some 3D modeling software, Augment3d uses the Z plane for up / down positioning.
Automatic uses the coordinate assignments from the source software. Z-Up assigns Z to up / down.
Note: If your model imports sideways, reimport using Z-Up.
Provides options for optimizing the object for better Augment3d performance. Neither option can be undone after import is complete.
Once imported, the file will appear in the Library. Drag it into your workspace to add it to your model.
Note: Vectorworks converts objects to metric on export even when drawn in imperial. It is best to select meters on import, but check scaled values for accuracy.
CAUTION: Custom objects imported into the Library but not added to the Augment3d model will be removed upon shutdown of Augment3d.