The Dimmer Properties Editor allows you to edit the configuration of dimmers or ranges of dimmers in your Sensor+ rack.
VIDEO TUTORIAL: to view an overview video tutorial showing how to use the "CEM+ Dimmer Editor". To view the video tutorials, you must have installed an MP4 compatible video player, such as QuickTime.
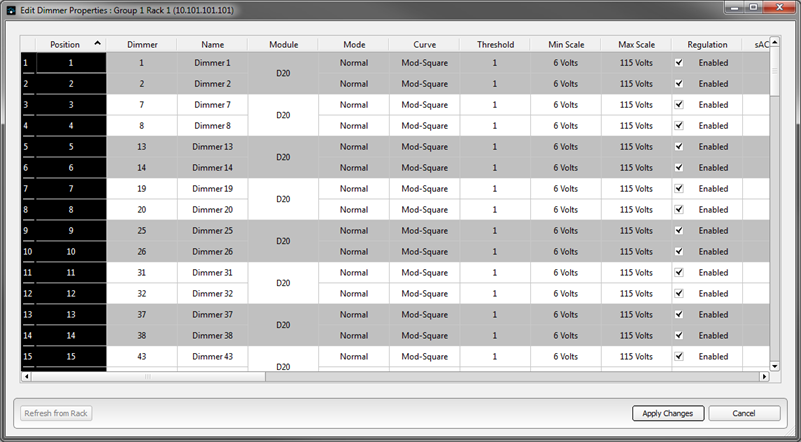
The most common properties for the Sensor+ dimmers are shown in the table view. For complete information about the function of each property, refer to the Sensor+ CEM+ User Manual. To edit any individual values in the table, simply click on the cell you wish to edit and enter or select the new value.
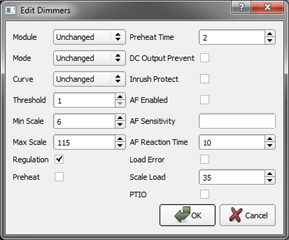
The following columns are shown in the table for edit:
- Position - the physical position (lug) of the dimmer in the rack, starting at the top and working downwards.
- Dimmer - An editable, user assignable reference for the specific dimmer in the rack.
- Name - Name allows you to give each dimmer (circuit) a free-text name.
- Module - Module defines the type of module that is or will be physically installed in the rack. ETC produces a wide range of dimmer modules for different applications, including dimming, relay and thru-power modules.
- Mode - Mode controls the manner in which the dimmer controls it's output.
- Curve - Curve controls the "shape" of a dimmer's output. Sensor+ dimming systems have a variety of curves available.
- Threshold - In switched mode the threshold value defines the control percentage at which the output turns on. In dimmed mode, the threshold defines the level at which preheat is applied
- Min Scale - This value is the lowest output level (in Volts) of a circuit once it is turned on at its control threshold. When preheat is enabled, the output is at min scale below threshold. When preheat is disabled, the output goes to zero.
- Max Scale - This value is the highest output level (in Volts) of a circuit at 100% control.
- Regulation - When enabled, the dimmer will maintain the desired output voltage based on the mapping of control level to scaled curve for the voltage output. When disabled, the dimmer will be set to a constant firing time based on the control level.
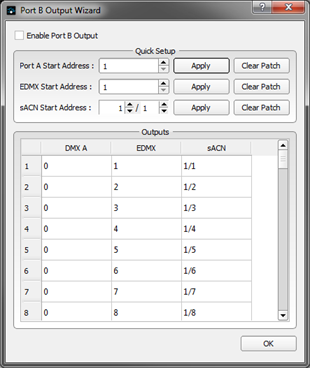
- sACN Channel - The Streaming ACN patch of the dimmer.
- EDMX Channel - The EDMX patch of the dimmer.
- DMX A Channel - The patch of the dimmer on the DMX input A to the rack.
- DMX B Channel - The patch of the dimmer on the DMX input B to the rack.
- Preheat - Select whether the dimmer has preheat enabled or not.
- Preheat Time - Preheat Time value allows the preheat level to be sneaked back in after a blackout to allow rapid snap blackouts. This property specifies the length of time for the ramp back to preheat level. Default = 2 seconds.
- DC Output Prevent - If enabled, ensures that both positive and negative half cycles of the dimmer output are always equal. This setting is typically used for loads sensitive to DC for example transformers and electronic loads.
- Inrush Protect - Provides a soft start feature when lamps are turned on from “0” by ramping up the level over three main cycles.
- AF Enabled - Select whether Sensor Advanced Features are enabled for this dimmer.
- AF Sensitivity - Determine the sensitivity of this dimmer to load change. Specified in Amps.
- AF Reaction Time - Determine how quickly the dimmer reports load errors, in seconds.
- Scale Load - Configures the choke correction in the dimmer module.
- EDMX, sACN and DMX DD - Determine the patch for dimmers using ETCs Dimmer Doubling feature.
- PTIO (Pass Through If On) - Configure a special relationship between dimmer level and control prioritization.