Importing Augment3d Fixtures
Fixtures can also be manually added by importing them into Augment3d object library Browser via File > Import > MVR / Capture Model. This option supports both MVR and GITF file formats. See Supported 3D File Formats.
Note: MVR files can also include 3D model data. If Augment3d is running, the Merge Augment3d Scenery (#) option described below can optionally merge this data into Augment3d. If Augment3d isn't running, or running on a tethered device, a notification will prompt you to open Tab 38 to merge scenery.
Import Options and Mapping
When importing certain file types, you will likely need to adjust the data before proceeding.
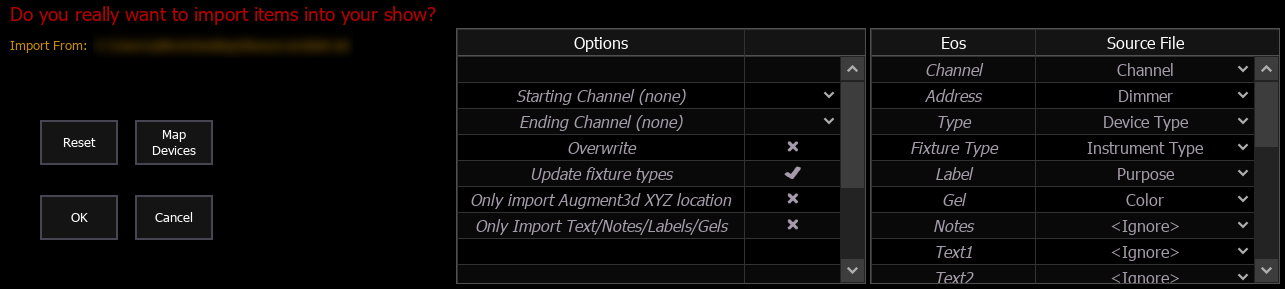
Options
The following options are available:
- Merge Augment3d Scenery (#) - when enabled, any 3D scenery in the source file will be merged into Augment3d. Disabled by default. The number in parentheses indicates the total amount of 3D objects in the file.
- Starting / Ending Channel - defines a specific range of channels to be imported.
- Overwrite - overwrites the data in the show file when enabled, and merges the data when disabled. Disabled by default.
- Update fixture types - enables or disables the update of fixture types in the show file. Enabled by default.
- Only import Augment3d XYZ location - enables import of just Augment3d location data. Disabled by default.
- Only Import Text/Notes/Labels/Gels - enables import of just the patch database text. Disabled by default.
Mapping Fields
You can map Eos patch fields to fields in the source file being imported. Channel and Address are required; any other field can be ignored if desired. Options can be selected again for placement in multiple fields.
Address Formats
Eos can import addresses in both absolute and port/offset format. For example 513 or 2/1 are both valid formats for importing the first address of the second DMX universe. Eos will convert all formats to n/n.
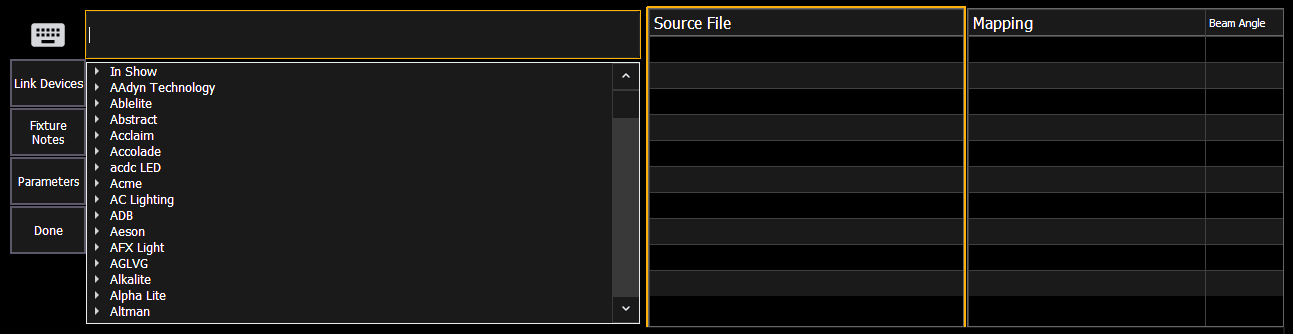
{Map Devices}
You can also map Eos fixture library devices to devices in the source file.
-
Select {Map Devices} to open the mapping utility.
- Select a device from the Source File column and choose its matching Eos fixture profile.
Multiple devices can be selected at a time.
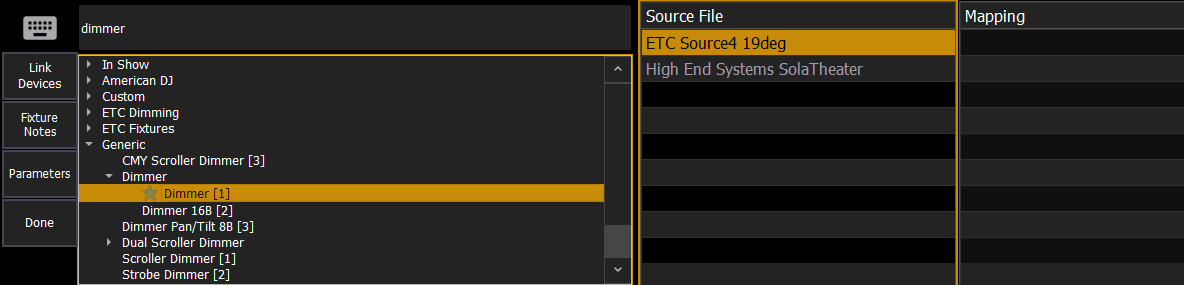
- Select {Link Devices}.
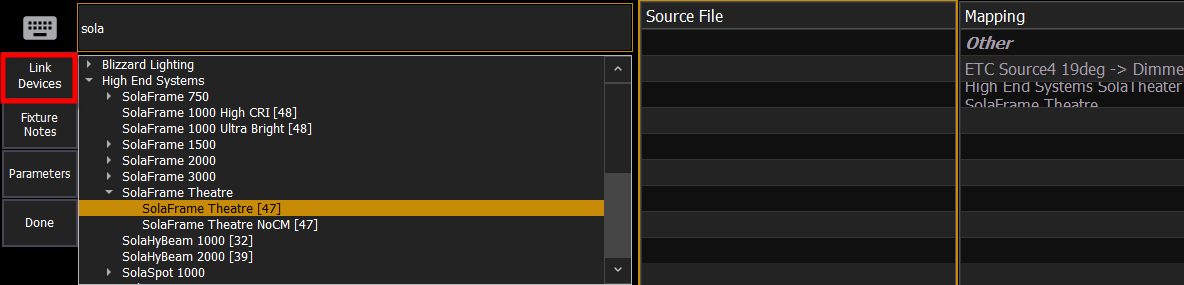
- Repeat steps 2 and 3 until all devices have been associated with fixture profiles. To unlink a device, select it in the Mapping column and select {Unlink Device}.
- When complete, select {Done}, then {OK}.
Device mapping and import fields are saved with the show file.
Vectorworks Import Support
Eos 3.2.0 and newer utilize Vectorworks' MVR export to move model and fixture data, and require Vectorworks 2023 Service Pack 3 or later. Older versions of Eos use generic 3D exports from Vectorworks for models, and an ETC-made plug-in for fixture data.
For legacy installation instructions, see Appendix > Vectorworks Augment3d Plug-in (on page 1).